
VoIP ( Voice Over IP ) Security Assessment Tool :
Viproy :
Voip
Penetration and Exploitation Kit is developed to improve quality of SIP
penetration testing. It provides authentication and trust analysis
features that assists in creating simple tests.
10 different modules with authentication support: options tester,
brute forcer, enumerator, invite tester, trust analyzer, proxy and registration tester.
All attacks could perform before and after authentication to fuzz SIP
services and value added services.

Viproy
is a tool for testing SIP servers security, the Session Initiation
Protocol is widely used for voice and video calls over IP, the software
comes with different modules performing specific tasks, all of the
modules support debugging and verbose mode, this is a Linux only command
line tool, instructions are included and it should not be difficult for
a Linux beginner to understand them. - See more at:
http://www.hacker10.com/tag/voip-penetration-testing/#sthash.vcWe7zby.dpuf
Video :More Info : http://viproy.com/voipkit/
Download Link : https://github.com/fozavci/viproy-voipkit/archive/master.zip
SIPVicious : ( Tools for auditing SIP based VoIP systems )
SIPVicious suite is a set of tools that can be used to audit SIP based VoIP systems. It currently consists of four tools:
- svmap - this is a sip scanner. Lists SIP devices found on an IP range
- svwar - identifies active extensions on a PBX
- svcrack - an online password cracker for SIP PBX
- svreport - manages sessions and exports reports to various formats
- svcrash - attempts to stop unauthorized svwar and svcrack scans
Download Link : http://code.google.com/p/sipvicious/downloads/list
VAST : ( VIPER Assessment Security Tools )
VAST is a Linux-based security distribution specifically designed for
pentesting VoIP and UC networks. It enables security professionals and
UC administrators to rapidly perform VoIP security assessments and
enumerate vulnerabilities in IP Phones or IP PBX servers in a lab
environment. With VAST, a security consultant has every tool necessary
to carry out a successful onsite or remote penetration test or
vulnerability assessment against a UC network. VAST is built on Mint
Linux 13 and includes all of the open source VIPER Lab tools, in
addition to some other network pentest tools.

Download Link : http://sourceforge.net/projects/vipervast/files/
SiVuS - VoIP vulnerability scanner
SiVuS is the first publicly available vulnerability
scanner for VoIP networks that use the SIP protocol. It provides
powerful features to assess the security and robustness of VoIP
implementations and it is used by VoIP product vendors, security
consultants, network architects, researchers and students. We encourage
our community to provide us with feedback so we can enhance the current
implementation and support the efforts to strengthen the security of
VoIP networks.

More Info : http://nil.uniza.sk/sip/tools/sivus-voip-vulnerability-scanner
FreeSentral :
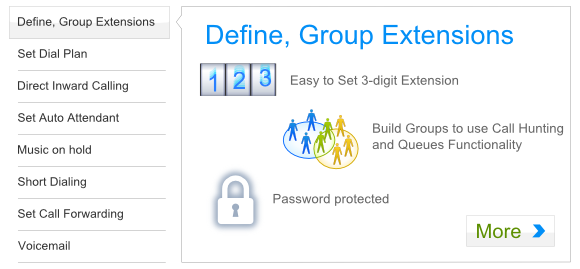
Features
- Define, group extensions
- Set dial plan
- Direct Inward Calling
- Set Auto Attendant
- Music on hold
- Short Dialing
- Set call forwarding
- Voicemail
For all security audits on VoIP systems, FreeSental can make a quick and
easy solution to implement. It can therefore be used as a training
platform for testing VoIP vulnerabilities and issues. See here our VoIP tools collection to help you auditing and scanning.
Download Link : http://www.freesentral.com/index.php/Download/Download
Thanks,
RRN Technologies
